While messing with Bevel modifiers for the one-millionth time, I had the idea to create an add-on which could keep bevels in sync throughout a scene.
To make it more flexible, I call these “Smart Bevels” which can be used independently from regular bevels, though under the hood they are the same.
Basically, we create some global variables that store the bevel amount and segment count. The user may then add Smart Bevel modifiers to selected objects using the sidebar button or F3 menu. When the user clicks the “Apply Settings” button, the settings in the sidebar are propagated to each object with a Smart Bevel modifier. This can be done as many times as you want.
You can see it in action here:
As always, the code is open and freely available here.
If you have comments or suggestions, raise an issue on GitHub.
For all of the little projects I’ve done with voxels and Python, I’ve had to create some kind of custom representation of voxel entities on the back end. This was sloppy, but not really a problem until I started adding a bunch of custom features to voxygen (which I’ll be writing about soon). Every conversion, load, and render required conversions from one model to another, and they were beginning to get jumbled.
I needed a data model for Voxel data that is both flexible and fast, which could handle all of the most common tasks like reading and writing .vox files, but also open doors for complex custom operations.
Existing solution #1: py-vox-io uses a nifty data type called a namedtuple for Voxel representation. In this scheme, each Voxel object knows its own x, y, and z coordinates. The included coordinates could be handy, but it requires us to store an extra three ints per voxel, which quadruples the size of the model. On entities with hundreds of thousands of voxels, that’s a lot of fluff that we can probably cut out if we’re clever.
Existing solution #2: NumPy N-dimensional arrays (ndarrays). Fast and extremely memory efficient, there’s no denying NumPy arrays are an excellent choice for storing large numbers of objects of the same data type. However, ndarrays lack functionality specific to voxels. I wanted something fully featured so that I wouldn’t have to rewrite IO, conversions, or functions like flip.
VoxyPy is a high level data model for voxels. It has two main components: the Voxel class and the Entity class.
Voxel
Voxel is a small class representing one cell in an Entity.
Voxel colors are represented as indices from 0 to 255, where 0 means blank. These indices refer to actual RGB colors in a 1×255 .png file. So, for example, if the 10th pixel in the texture is red, then a voxel with value 10 will render as red.
It very thinly wraps a primitive int, allowing easy conversion and equality operations. Voxels and ints can be used interchangeably in most operations.
The Voxel class allows for a special addition/subtraction case: Adding 1 to 255 causes the color to wrap to 1 instead of 0. Similarly, subtracting 1 from 1 causes the color to go to 255 instead of 0. This is because 0 is blank in Voxel texture language, so if we wanted our color palette to repeat without a gap, we’d have to make a clever manual skip every time the index would be set to 0.
Entity
Entity basically functions as a space suit for a private ndarray called _voxels. It contains integer representations of each voxel within a model. By keeping _voxels private, we can manage user access, and also provide an efficient interface which gives and receives Voxel objects or integers on nearly even footing.
VoxyPy is currently available from PyPI/pip! Just install using
pip install voxypy
More documentation, including IO and example code, is located in the VoxyPy GitLab repo.
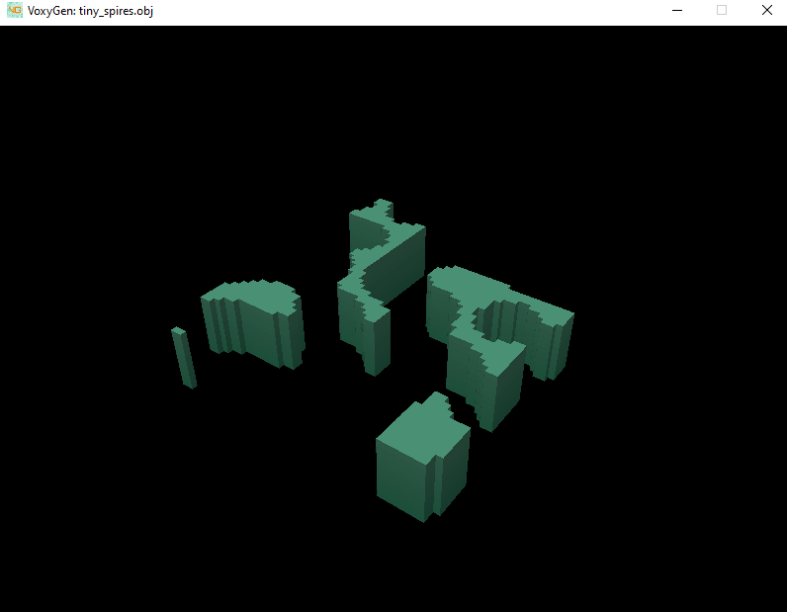
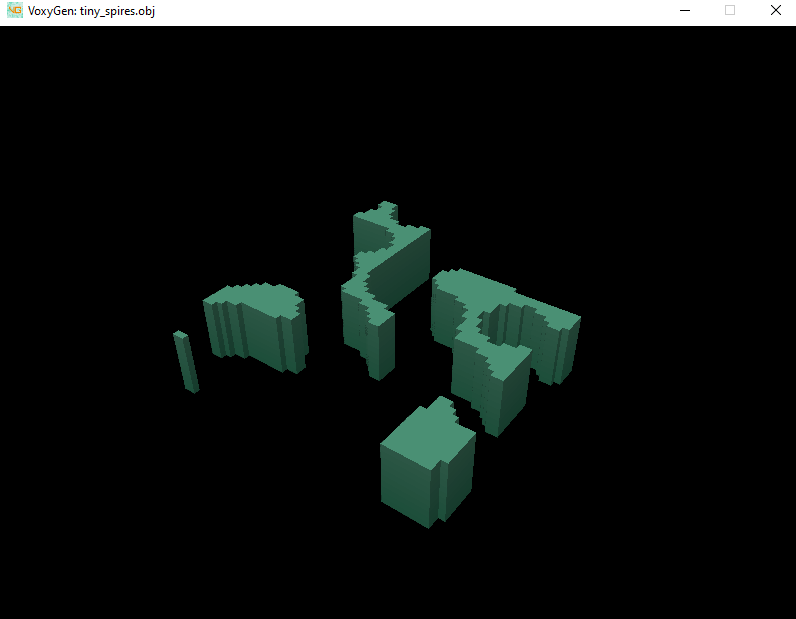
VoxyGen has had a lot of updates in the past few months, and I’ve been working on an extensive post detailing all the new features. But in the meantime, here’s a fun little update I added today that should yield some cool results when used correctly.
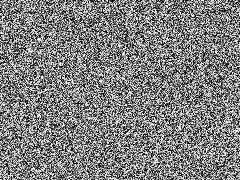
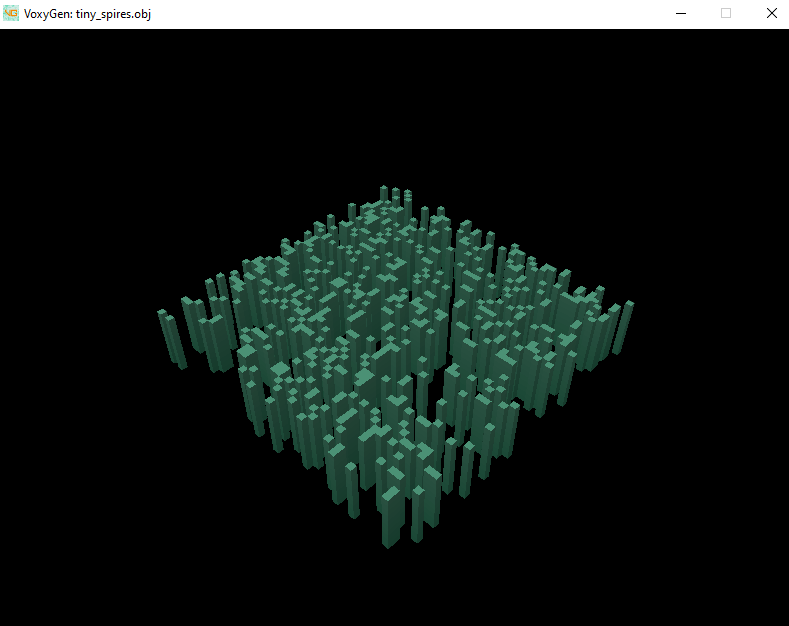
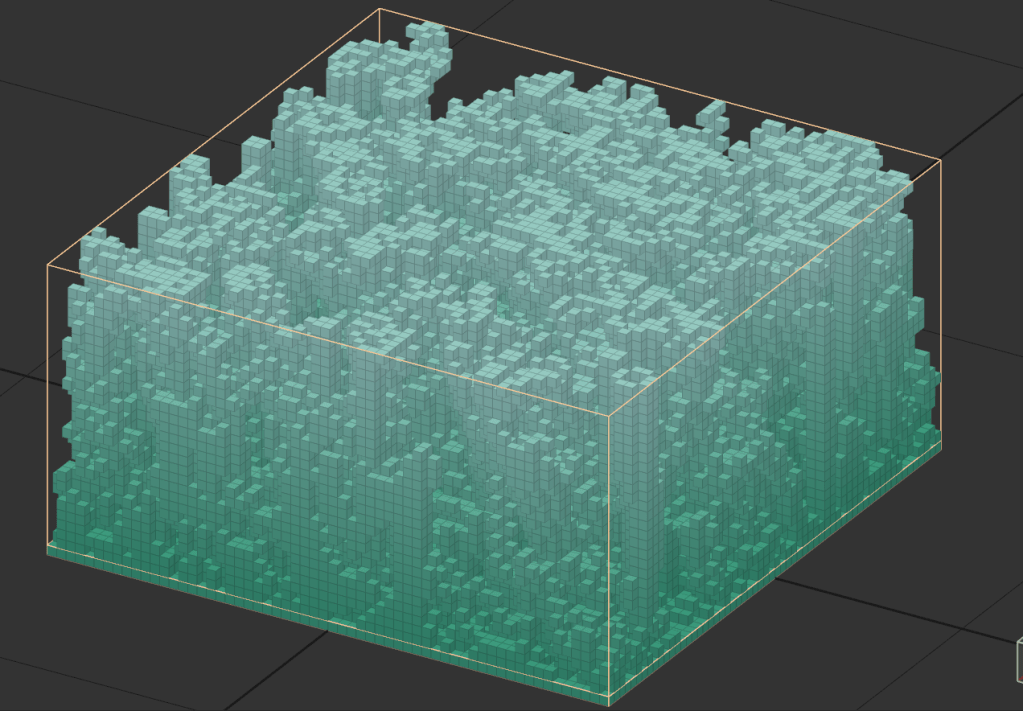
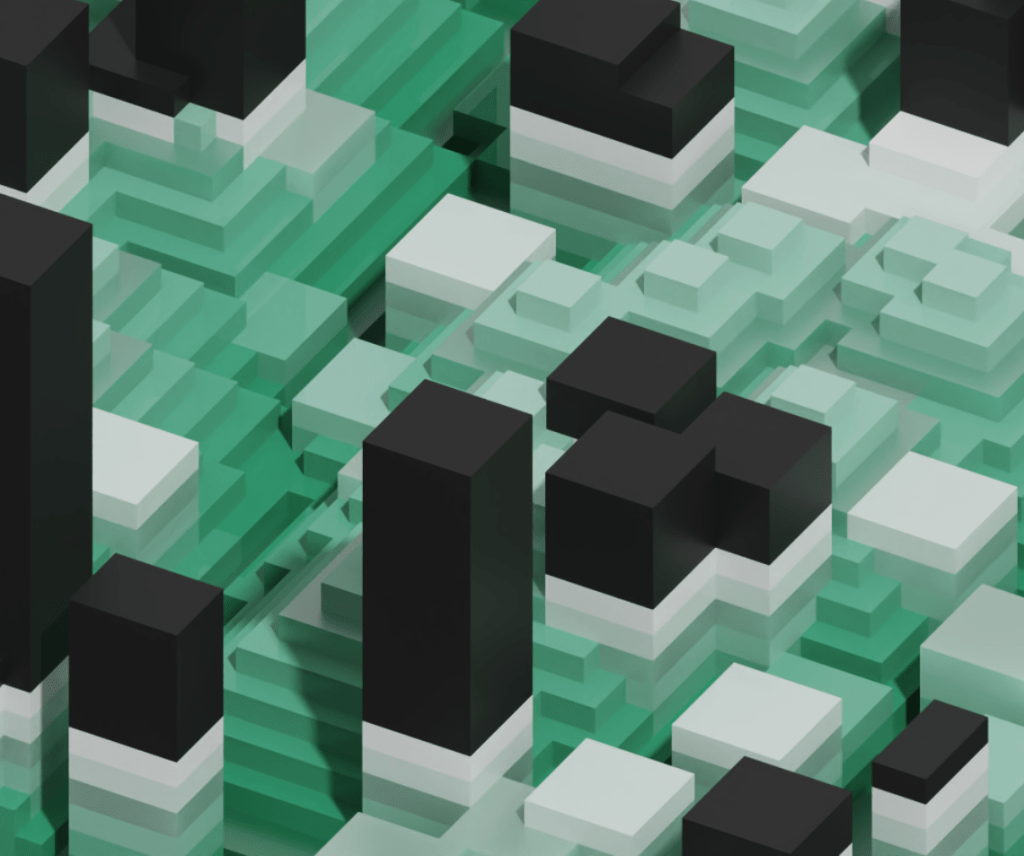
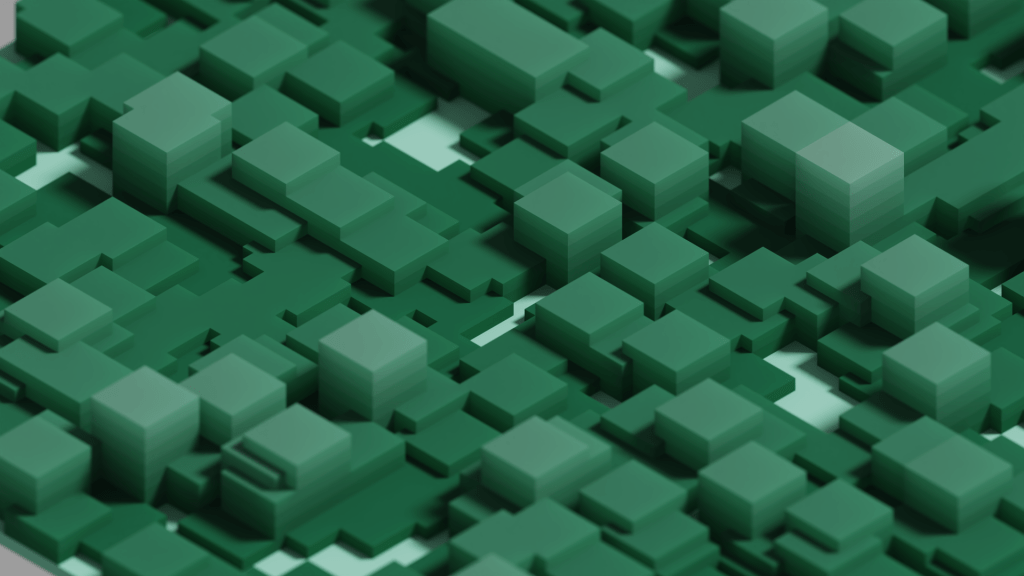
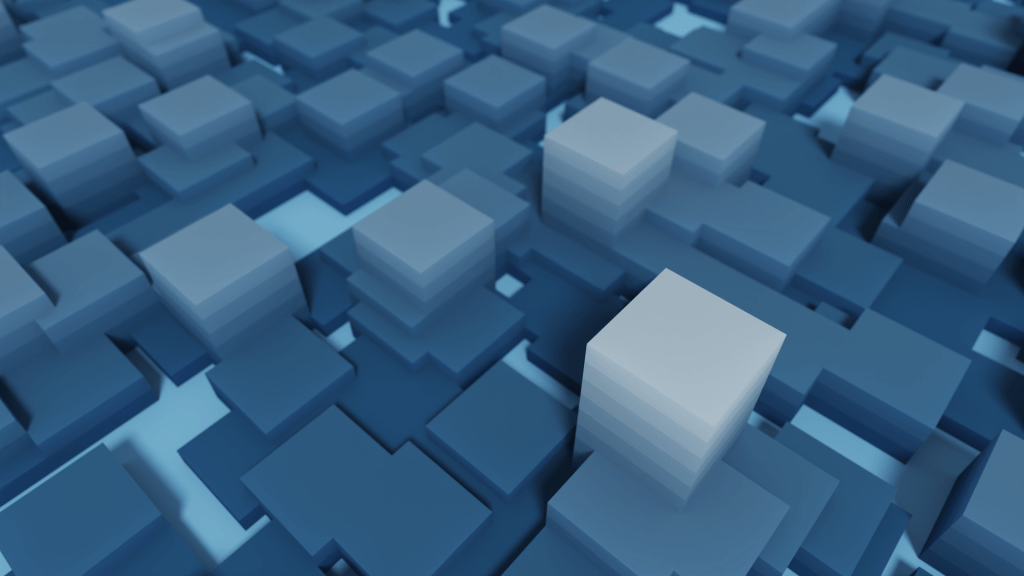
I’ve added Perlin noise to VoxyGen for commands that require seeds! Currently, this only includes spires and life, but I’m sure it will have plenty of uses in the future.
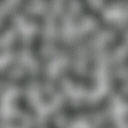
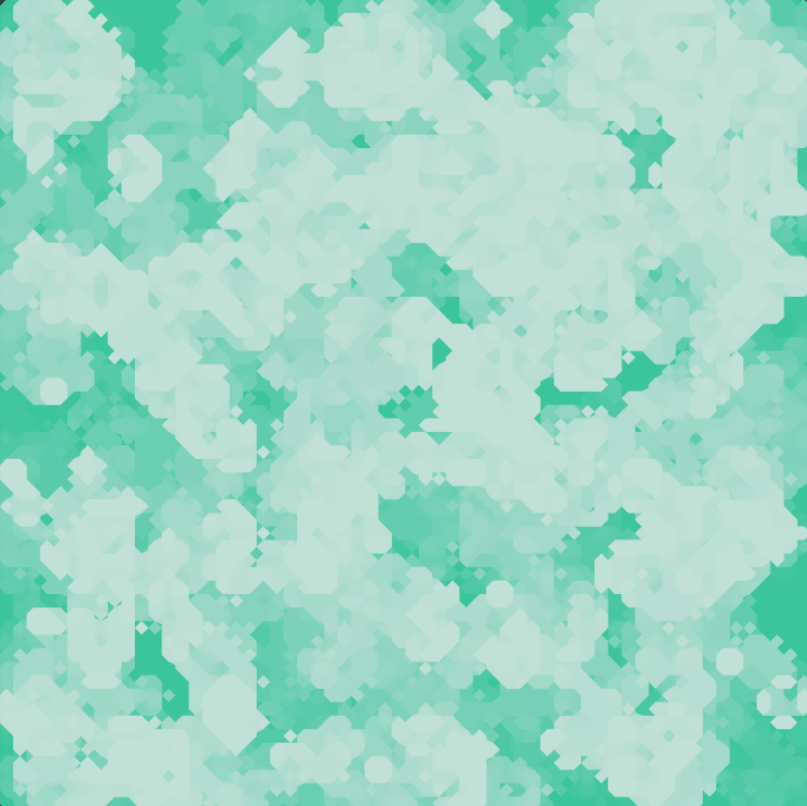
Previously, the only random distribution available was random (white) noise. Perlin allows for clumpier, more natural shapes. Here’s a comparison of the two:
White vs Perlin noise
(Including a preview of VoxyGen’s new built-in renderer)
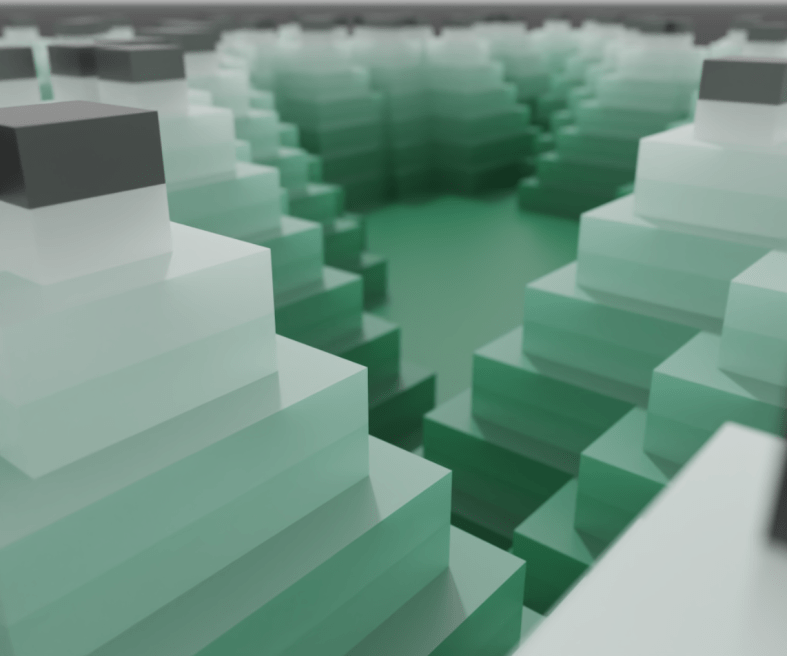
This actually makes a really cool organic texture when viewed from above and shadeless!
By switching the voxel shape to marching cubes, we get something a little less Minecraft-y
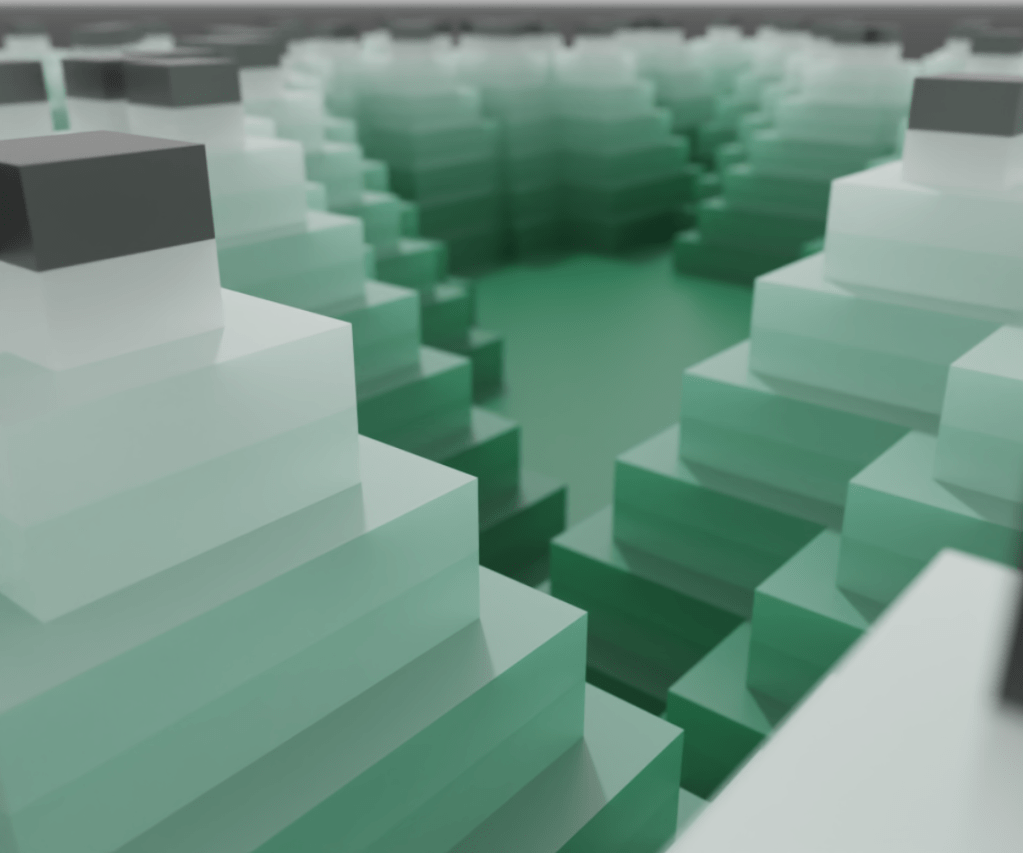
And finally, with the logo overlaid
Neat! This is actually a really good example of how quickly VoxyGen can churn out interesting results, especially when paired with a little creative manual input.
Sorry for the clickbait title, it was low hanging fruit.
Today I’ll be adding Conway’s Game of Life to VoxyGen. If you’re not familiar, it is a zero-player simulation “game” with simple rules, but it has been studied extensively by mathematicians and scientists for decades.
“Life” takes place on a two dimensional grid. Each “turn”, all of the “cells” are evaluated to generate the next iteration. This can repeat indefinitely.
Here’s an example of a famous structure, dubbed Gosper’s Glider Gun, that creates knots of traveling cells:
Life operates by a simple set of rules:
If a cell is ON and has fewer than two neighbors that are ON, it turns OFF
If a cell is ON and has either two or three neighbors that are ON, it remains ON.
If a cell is ON and has more than three neighbors that are ON, it turns OFF.
If a cell is OFF and has exactly three neighbors that are ON, it turns ON.
From this, there are many possibilities for patterns and structures, with interesting new ones being discovered all the time.
The implementation is pretty straightforward:
def life_layer(old_layer, color):
    x_size = len(old_layer)
    y_size = len(old_layer[0])
    new_layer = np.zeros((x_size, y_size), dtype=int)
    for x in range(x_size):
        for y in range(y_size):
            neighbors = count_neighbors(old_layer, x, y)
            if old_layer[x][y] != 0:  # alive
                if neighbors < 2:
                    new_layer[x][y] = 0
                elif neighbors == 2 or neighbors == 3:
                    new_layer[x][y] = color
                elif neighbors > 3:
                    new_layer[x][y] = 0
            elif neighbors == 3:
                new_layer[x][y] = color
    return new_layer
Wow, that’s pretty interesting. Right away, we can see some of the classic formations.
Front and center, you can see a static beehive:
Way off to the right, you can see a simple blinker:
And a bit to the left you can see the formation of a stable block:
There’s a lot of creative potential here for injecting some nice, organic randomness into your generated models.
What about some fun stuff? Lets make a glider shape, which you can see being emitted from Gosper’s Gun earlier in this post. This shape will repeat itself forever, flying away into the void.
Cool, but lets try a pulsar
Sweet. The pattern injection code is against the spirit of generative art… but in the spirit of the game of Life, I’ll let it slide.
Next time I’ll experiment with further parameterizing the game to allow greater flexibility in rules.
Today I took an important step in VoxyGen: YAML compatibility!
For the uninitiated, YAML is a simple data presentation format designed to be human readable and editable.
Eventually, I’d like VoxyGen to be fully usable (and scriptable) by non-programmers, so this is a great start. Right now, VoxyGen “scripts” contain a bunch of parameters for creating generative voxel pieces. I’m saving them as .vxgn files, even though technically they follow the YAML syntax exactly.
Here’s a simple example of a script that generates pyramid shapes (spires command with decay_rate=1), then overwrites them with rectangular prisms (spires command with decay_rate=0).
You may use some, all, or none of the named arguments for functions named in the wiki. If you don’t specify the value for an argument, a default value will be used.
This is the result!
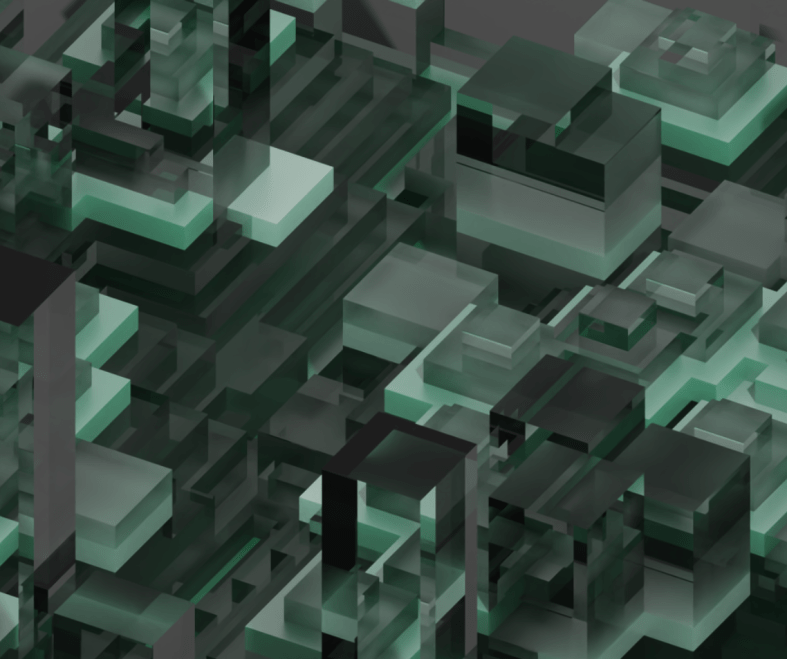
It also looks very snazzy with half of the materials set to glass shaders.
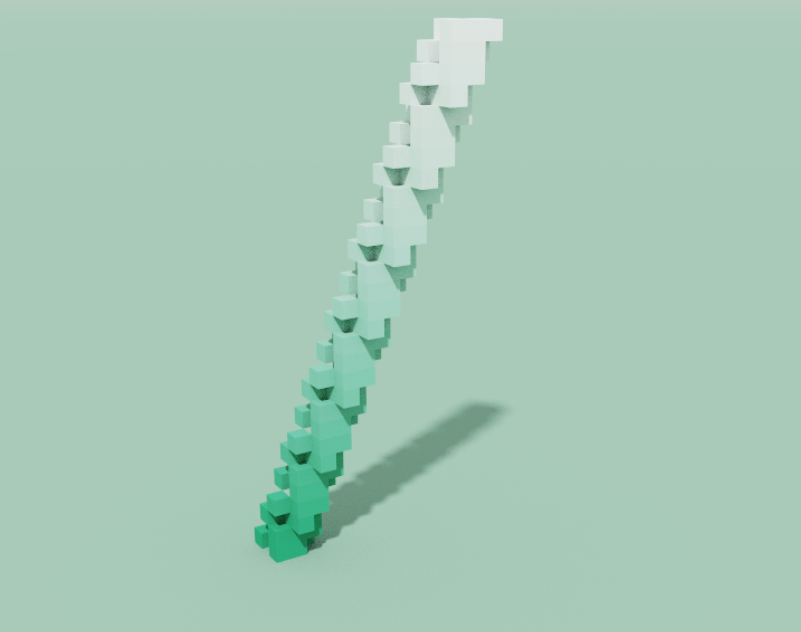
Fun fact! Pyramids can be easily produced with VoxyGen, using spires with a decay rate of 1.0 and a nice, large width. Coming soon: a way to randomize any variable, including width!
After a few busy months of other projects, I’m ready to knock the dust off of VoxyGen!
If you’re not familiar, voxels are essentially the 3d form of pixels. You can use these little blocks to make some staggeringly beautiful scenes, robust interior designs, fun data visualizations, and of course, giant robots. My pal megavoxels on Instagram does an excellent job curating voxel art if you want to see some great examples.
Voxygen is substantial extension for the py-vox-io package, allowing users to turn mathematical expressions and geometry commands into Magicavoxel .vox files. The goal of VoxyGen is to implement a domain-specific language with which users can easily create generative voxel art. Ultimately, I’d like to interface this with a browser client or Discord bot or something to allow super easy access.
Since it’s been about six months since I opened the project, of course I had to do some fiddling with dependencies. When importing py-vox-io, you use an internal package called pyvox like so:
import numpy as np
from pyvox.models import Vox
from pyvox.writer import VoxWriter
PyCharm attempts to fill this dependency with pip install pyvox, which unfortunately does not work, as it gets confused with an old medical imaging package (actually called pyvox) from 2006. You’ll receive the error:
ERROR: Could not find a version that satisfies the requirement pyvox (from versions: none)
To rectify this, one can simply pop open the PyCharm console and type pip install py-vox-io
Sweet.
It’s alive! Something you may notice is the obfuscation of x, y, and z dimensions from the user. This is because, for some odd reason, py-vox-io regards the second dimension as vertical. I’ve seen this in a few other places before, namely older style modeling tools like Blockbench. Personally, I find it absolutely egregious and I’m willing to take great pains to right this wrong.
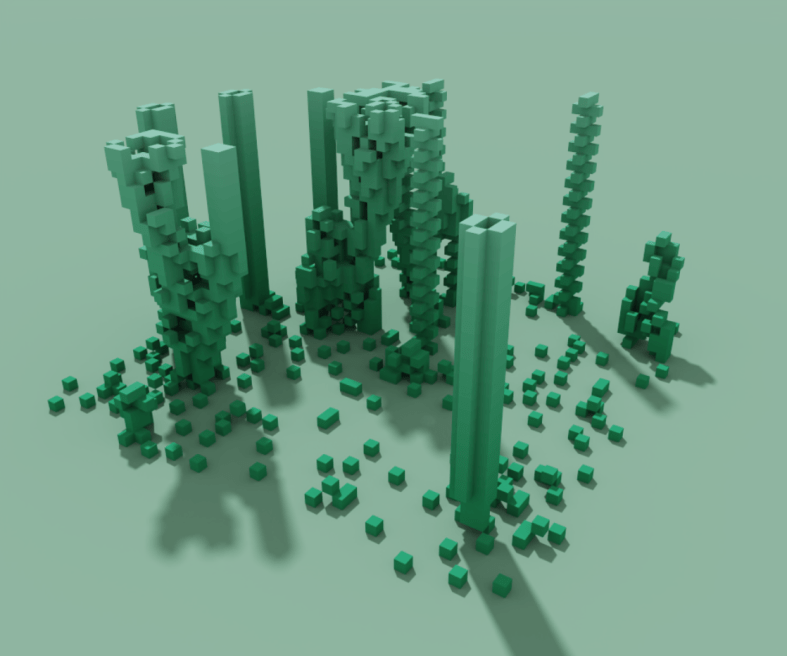
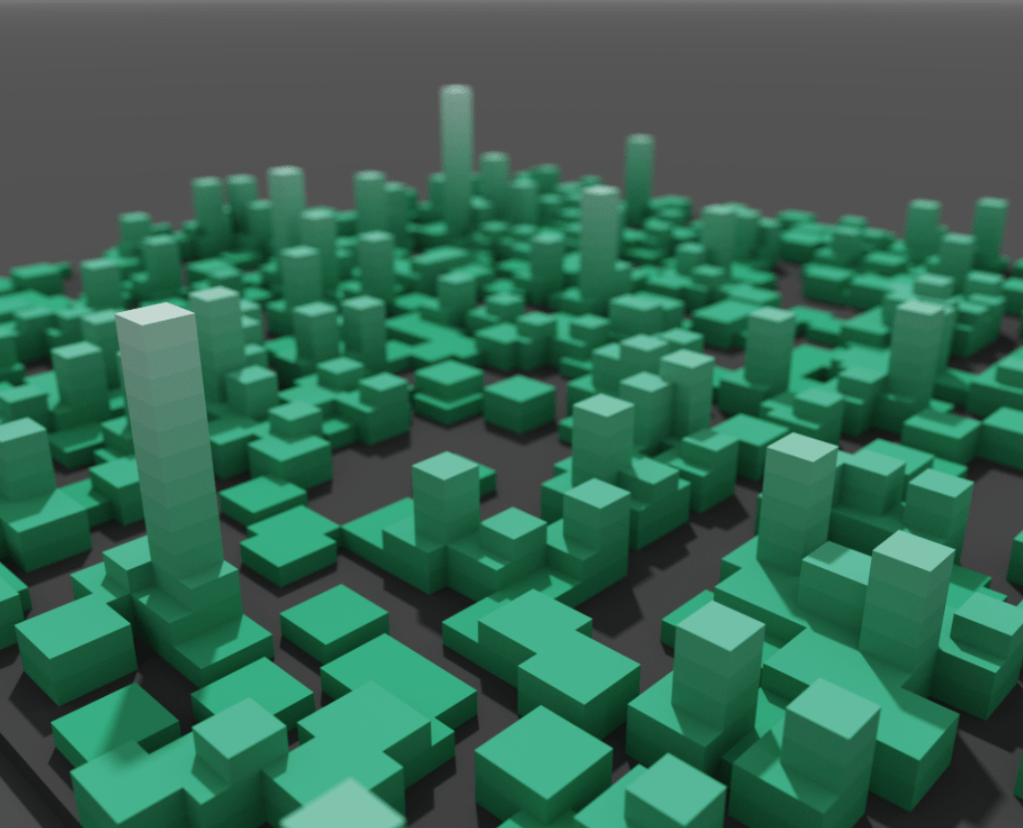
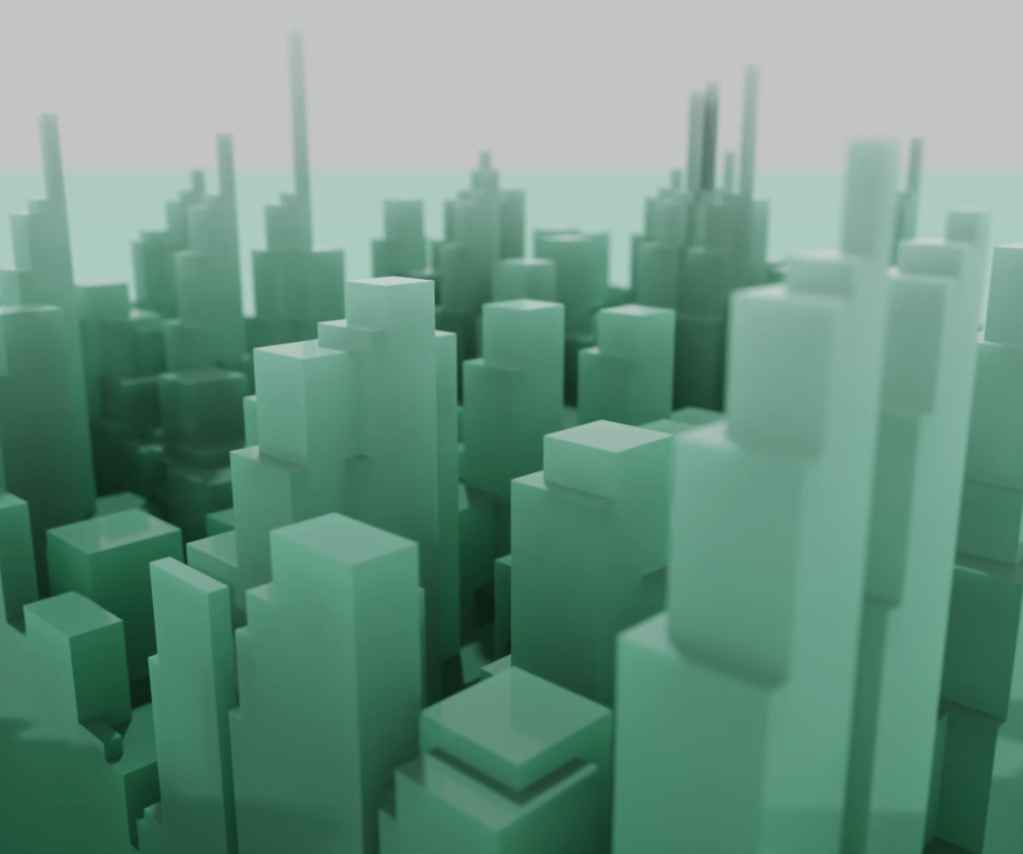
Let’s do something a little more exciting. I revamped a fun little function called generate_spires:
The code behind the scenes is still a bit of a mess, but the results are pretty neat. Here’s a few more generative pieces from the spire function.
Neato. Next time, I’ll refactor the spires function for efficiency and maybe add some new toys to the mix. If you want to follow the project, it’s on GitLab. Happy coding!
While making Vox2Obj user-friendly for a friend yesterday, I noticed that MeshLabServer had actually been deprecated in favor a Python package called PyMeshLab. This is great news! Except for the fact that, ya know, I had already built my pipeline around MeshLabServer.
So today, against my better judgement, I’ve redone the pipeline with PML instead. As far as ultra-complex APIs go, I must say this is the most well-documented one I’ve ever encountered. For once the quick start guide actually got me quickly started, and scripting was not terribly difficult. The code is available at the Vox2Obj repo.
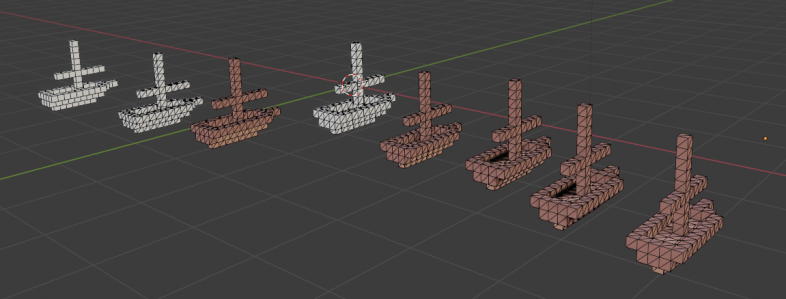
Pictured above are my progress models from development tonight. Getting the shading to land right was a little weird; using Merge Vertices By Distance resulted in some very strange shading on every edge. However, Merge Duplicate Vertices created desired results. Weird.
For some reason, I still can’t get the texture to stick when I don’t triangulate the mesh first, meaning I have at least twice as many polygons as I should. Oh well. Eventually I’ll pop over to the MeshLab forums and get somebody to help me with uniting same-color-and-orientation faces to create truly optimized meshes.
In 2020 I made many voxel models of varying degrees of complexity. Some highly stylized little ships, some giant robots. However, voxel editors can only do so much, and animation is not possible (at least in Magicavoxel).
So I began importing my voxel models to Blender, a free Maya alternative I’ve used for nearly 8 years now. Unfortunately, there were a few problems.
Ephtracy, brilliant though they are, did not build an amazing .obj exporting feature into Magicavoxel. The geometry generated was pretty bad, and each object required individual editing to fix errant topology.
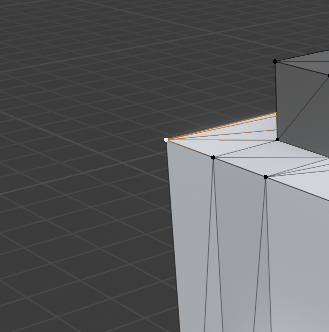
Here’s an example: the corner of this mesh is disconnected, and also a duplicate vertex! This can make for bad calculations of normals, which will mess up shading and possibly cause z-fighting among redundant geometry. Not ideal!
There’s also the problem of marching cubes. When exporting from Magicavoxel, marching cube voxel shapes are only supported in .ply and .mc formats, but in both cases, models lose their textures when imported into other engines. These formats also suffer from sub-optimal geometry problems.
Enter MeshLab, a free tool that can do… well… basically anything to meshes.
The tool is open source and extremely powerful, but not very user friendly. It took a TON of fiddling with different options to get something that exports consistently. And if you have a Magicavoxel scene with a ton of objects, you’ll be stuck clicking through the same options on MeshLab (or Blender) over and over.
I’ve created Vox2Obj to ease this process, and the results are excellent. For each object in your scene, the manual MeshLab process can take upwards of a minute, even with a practiced hand. With Vox2Obj, the meshes are optimized in a few seconds per object.
Take this model for example:
This guy has 33 moving parts! At a minute each, you’re looking at over half an hour of clicking through menus and typing file names. With Vox2Obj, you’re on your way in seconds.
And believe me, that geometry optimization is amazing. Along with marching cube functionality and baked-in textures, you’d be crazy not to use it.
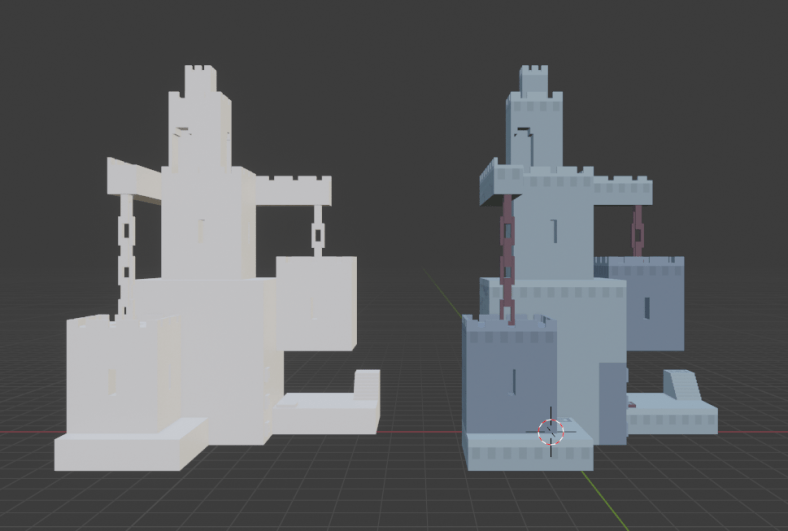
Here’s a before and after:
Usage documentation, code, and information on how to contribute are all located in the Vox2Obj Gitlab project.